Part 6 Lesson 3: FUN WITH MULTIPLE EXPOSURES
We are moving on from having to use a tripod for exposure (shutter speed) reasons, and looking at a project made possible simply by being able to guarantee the camera stays in the same place between shots: time lapse photography.
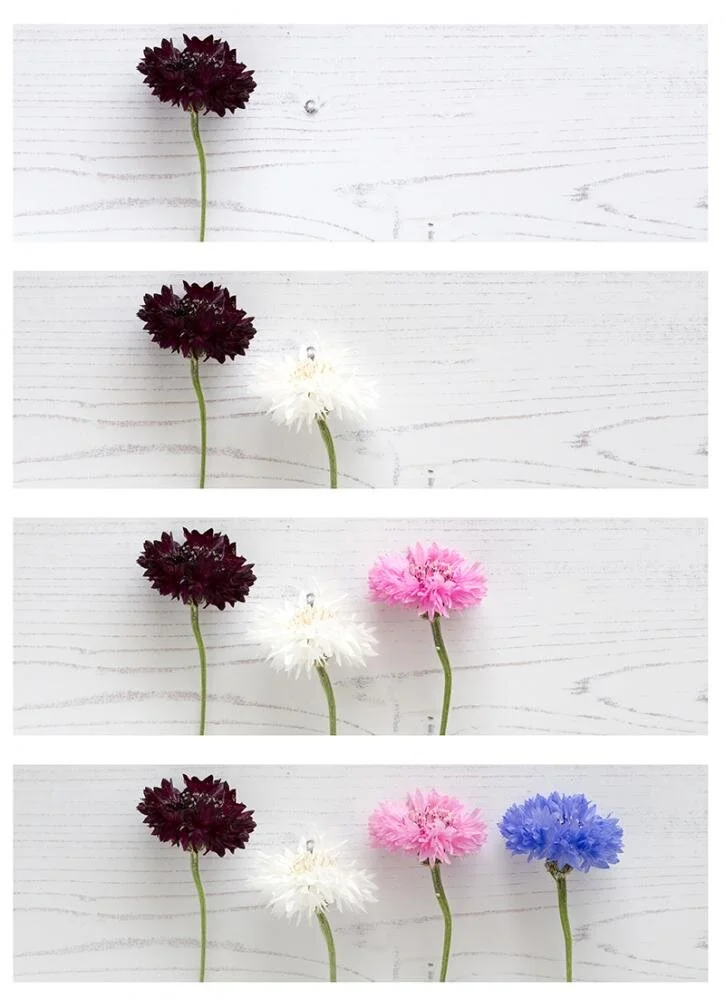
If you are prepared to leave your camera in the same place for any length of time you can take a series of photos showing the progress of something over time - think flowers opening, or a sunrise. Or you can stage a sequence. You can print the images as a series, or combine them in a video or GIF:
Fuji XT1, 14mm, ISO320, f22, 1/100, tripod
THIS WEEK'S PROJECT: TIME-LAPSE PHOTOGRAPHY
1. Set your camera up on a tripod or pile of books. A tripod is better because it is screwed firmly in one place and there is no chance that it will be accidentally nudged between shots.
2. You need everything off auto to avoid changes between shots. Double check: ISO set to 100 or 200, aperture chosen, shutter speed chosen, test shot for exposure checked. White balance set manually. Focus set manually.
3. Check your batteries are fully charged and your memory card empty and formatted. It's worth considering shooting JPEG to save space on your memory card if you are taking 100s of photos.
4. If you are happy to take all the photos, stand by with your self timer activated if needed, and then shoot your series. If it is a longer series, or you need precise intervals between shots, consider buying an intervalometer to automate everything. Check your manual - you camera may have a built-in intervalometer (mine did - I had no idea).
5. If you just want a series of 5 images to display, or a short GIF, then shoot 5 images. If you want to create a video then you will need 24 images for every second of film (for a 24 frame per second video).
6. If you are creating a video, use a longer shutter speed (at least 1/3 second) to avoid jerky transitions between frames if you have movement in each image. This is a more advanced technique - look up "time lapse shutter drag" online for more information.
7. Do not forget your composition.

How to make a GIF
Search online for "make a GIF" to find a free GIF generator. Upload your photos and then save your finished GIF to share.
If you have Photoshop, these are the steps:
1. File > Scripts > Load Files Into Stack
2. Choose files to use in your GIF; they will be opened as separate layers in the same document.
3. Window > Timeline
4. In the Timeline window, "Create Frame Animation" (actually click on these words)
5. Select > All Layers
6. From the small dropdown on the Timeline window, select "Create New Layer For Each Frame"
7. From the same menu, select "Make Frames From Layers"
8. Under each frame, choose how long it should appear (eg. 0.5 secs)
9. At the bottom of the Timeline window, select loop frequency
10. Save by using Export > Save for Web (Legacy) > GIF 128 Dithered
Topics for timelapse
Sunrise/sunset
Flower/petal opening, plant growing
Step by step tutorials
Traffic/pedestrian flows (be careful where you set up)
Construction sites showing building progress
Clouds or shadows
Something decaying
Ice melting
Something baking/growing/expanding in the oven
A creative project - painting, doodling, calligraphy
1. If you use the app, share in the Tripod group.
3. On Instagram, share with the hashtag #AYearWithMyCamera.