

Saturday May 13 2017: the first day this year it's been warm enough to shoot outside for more than 3 minutes.
Why shoot outdoors?
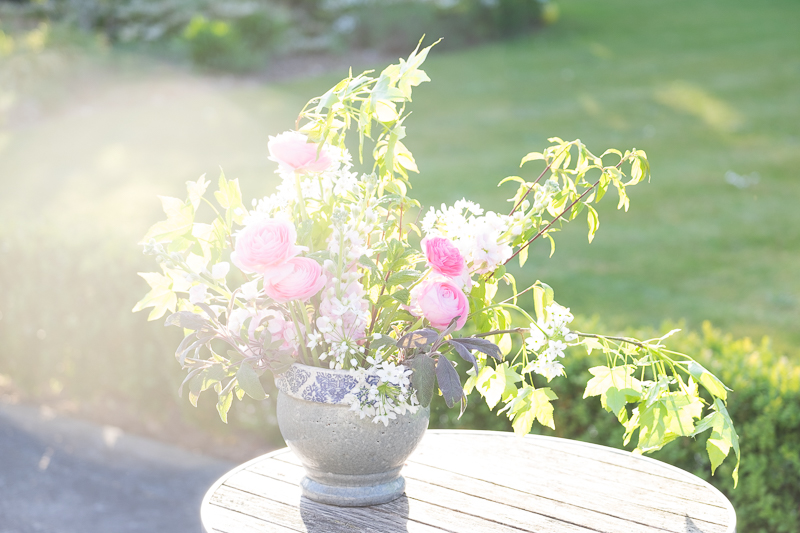
Your shots will come alive with a bit of sunshine. Compare the one above, shot outdoors with this one, shot indoors:
Studio shot
Free online photography workshop for complete beginners
I explain all the basics in this step by step workshop for beginner DSLR users. Join here and get started today:

Why shoot into the sun?
With the sun behind your subject, you get a gorgeous back light, and if the sun is low enough, rim light (where the subject is outlined by sunlight). And you avoid the washed-out, contrasty images you get if you shoot with the sun behind you or above you, and falling four-square onto your subject.
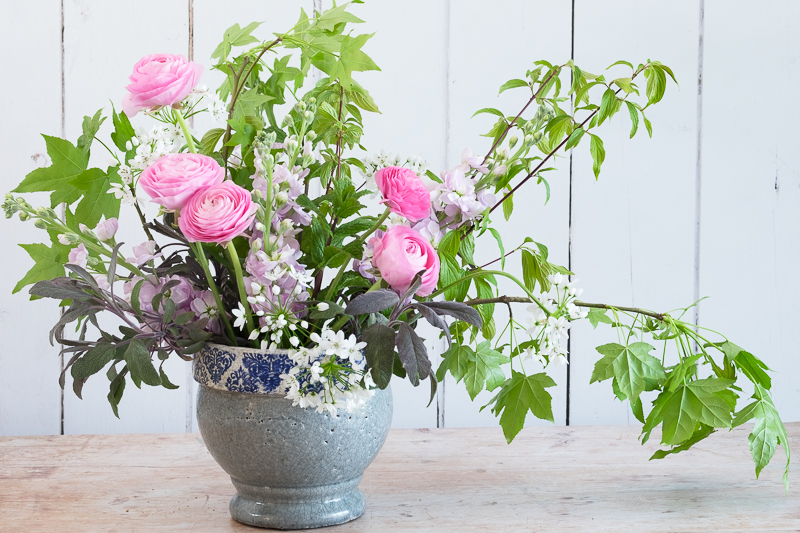
Look at this image, shot with the sun falling direct on the subject (coming from behind me):

Full sun
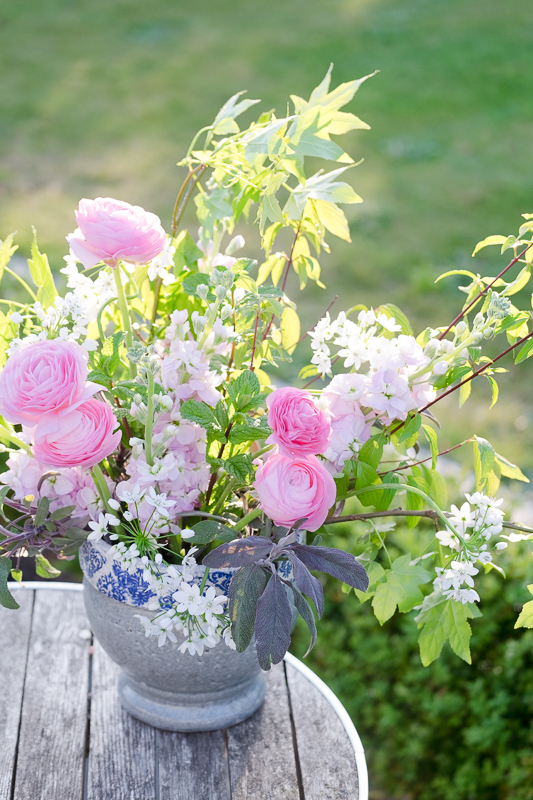
Now compare it to this one, where I just walked to the other side of the branch and shot with the sun behind the subject:

Sun behind
Which one is more alive?
Here's another example:

Shot in full sun
Same field, sun behind
How to shoot into the sun
Have you ever been told, "Never shoot into the sun"? Do you know why people say that? It's because when the sun is behind your subject and shining towards the camera you get a couple of problems:
1. sunflare
2. underexposed images
Sunflare happens whenever direct sun falls on your camera's lens (and is a million times worse if your lens is dirty):
Sunflare
To avoid it, first use that plastic screw-on tube that came with your lens. It's a lens hood and this is what it is for.
Next, try and position yourself so the sun is behind the flowers, but not falling on the lens. You might need to change your viewpoint:

If you don't want to change your viewpoint, use your hand to shade the front of the lens, but be careful not to get your hand in the photo:

That orange smudge top left is my out of focus hand
Now you just need to deal with the fact your camera will get the exposure wrong because all that sunshine fools it into thinking it's brighter than it actually is. This is what the camera will take if you don't correct it:

Uncorreced, underexposed
If you know what you're doing, use spot metering and meter off a green leaf on the shady side of your arrangement. Somewhere inbetween the ranunculus in this photo. Otherwise, find your exposure compensation dial and dial in +1.5 to +2 stops of exposure compensation. Your image should now be correctly exposed, have no sunflare, and be lit from the back with bright dappled sunlight:

Fuji X-T1, XF50-140mm at 77mm, f2.8, ISO 320, 1/350 (+2 exp comp)
Free online photography workshop - join here
This is one of a series of posts with behind the scenes steps of floral photography. To see the rest of the posts, click here: The Art Of Flower Photography.
You might also be interested in....
Problems you might have when learning about aperture
Make your own light: using long shutter speeds to create bright photos