What do you do when you want to create an anemone flatlay but you only have 6 anemones to work with? Bring out Photoshop.
This was what I managed in-camera:
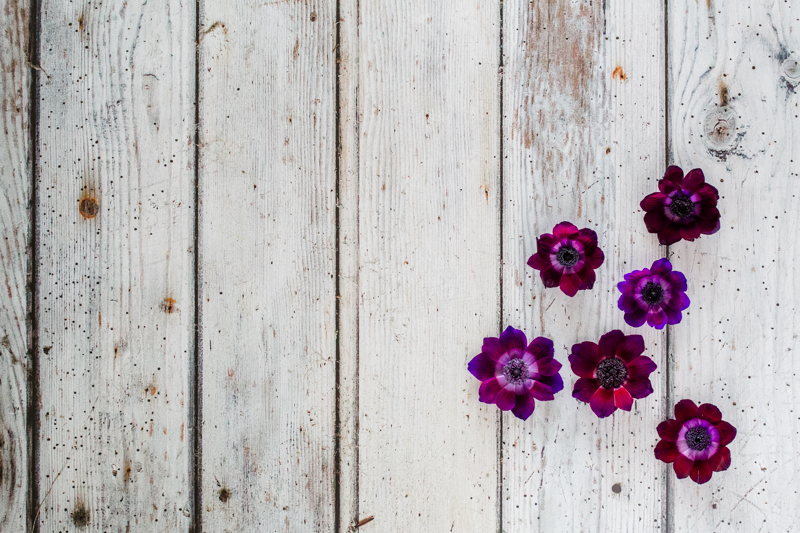
Not enough flower action. But by taking individual photos of each flower head on a plain background, I could easily cut them out in Photoshop and then reassemble them on a photo of the original wooden background.

The important thing to remember is to get as much right in-camera as you can. Keep the camera the same distance from the flowers, so they all stay proportionally correct (use a tripod). Keep the light direction the same - turn the flowers as you take them to keep the light direction the same, rather than relying on the Transform tool in Photoshop. Use a completely contrasting background so you can use the 1-click Magic Wand tool rather than the Pen tool to select the flowers.
Step by step:
1. Magic wand to select the background.
2. Delete the white background (unlock background layer if it's locked).


3. Crop to just the flower.
4. Save as transparent .png file.
5. Save steps 1 and 2 as an action, and also step 4 if you have many flowers to process.
6. File > Scripts > Load Files Into Stack will open all the saved flowers in one document. Make sure your background layer is at the bottom.

7. Cmd + Move tool, to select a layer by pointing at a particular flower.
8. Cmd + T Transform, to change size/orientation (but watch for shadows/light direction). Remember the % size change, and do the same for each, to keep consistent. (Use actions.)
9. Alt + move tool, to duplicate a flower.
10. If it all looks a bit unnatural, it's probably because you didn't bring the shadow across with you when you made the initial selection. You can add a drop shadow as a Layer Style (save as a preset and apply the same to all layers). Keep the direction consistent with the light source.

Don't forget step 7 - if you hold down the cmd key while you use the Move tool, you can select individual flowers and move them around without having to keep click on its layer in the Layers panel.
Finished image:

This post is the 3rd in a series of 52 Fine Art Flower Photos, a weekly project I've set myself this year. Once I've got to 5 or so I'll put them all on one page, in the meantime you can see the first two here (Tulip) and here (Blossom).
Join my free online beginner's photography workshop here
If you want more help with the basics - settings, composition, light - join A Year With My Camera, my flagship photo workshop. Register here and get started today: