

This week, one of my A Year With My Camera students described in our Facebook group how he aspires to take high key flower photographs like Mandy Disher. Amateur Photography magazine published a fantastic piece from Mandy where she describes her set up, lighting and gives plenty of tips (click here to read the post). My student was not getting the results he wanted, so I had a go at following the tutorial, and have found some detail is missing at the editing stage.
A Year With My Camera is my free, online beginner's photography course.
Register here to try it, and get started today:

I used Mandy's suggested lighting set up, although I don't have an LED light panel so I used my old slide viewing lightbox which worked fine:

Fuji XT-1, 50-140 at 50mm, ISO200, f11, 1/60, indirect natural daylight with reflector
Critical steps at this stage: rock solid tripod, self timer, counterbalance to stop the tripod tipping over, no direct light on the flowers, even top light (in this case daylight + reflector). Make sure your camera is directly over your flowers, and the sensor exactly parallel with the lightbox. Mandy uses a 100mm macro but mine is off for repairs so I used the 50mm end of my 50-140.
This is the image straight out of camera:

I played around in editing with this image but couldn't get the hyper-realistic detailed finish that Mandy produces. I found I had to use HDR to be able to hold detail in the highlights whilst still manipulating the shadows. High Dynamic Range photography just extends the range of tones beyond those that your camera can deal with in a single image.
How to do HDR
1. Take 3 images: one at a mid range exposure, another at +1 stop and the last at -1 stop. Use manual mode or aperture priority - you don't want the aperture changing between exposures. Do not move the camera or subject between exposures. Most cameras have exposure bracketing as a built in function where you set your + and - stops, and then one press of the shutter takes all 3 shots for you.
2. Combine the 3 images using HDR software. In Lightroom the HDR controls are under Photo > Photo Merge > HDR (make sure you have the 3 images selected first):
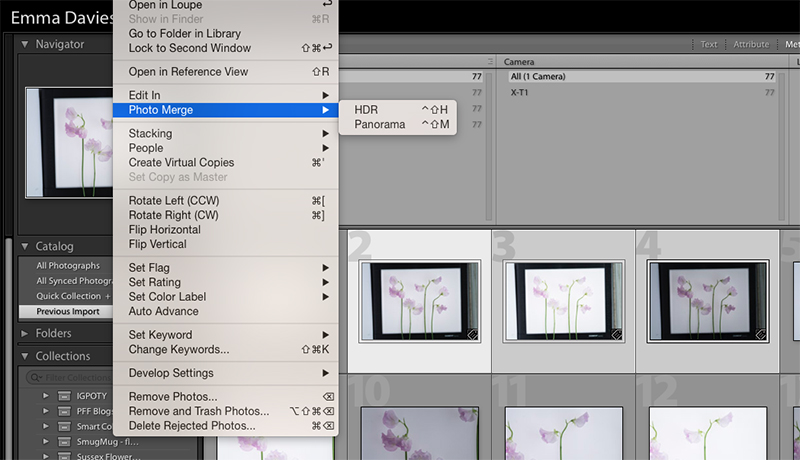
3. Find the HDR file (in Lightroom it is often saved at the end of the current thumbnails - you might have to scroll to find it). You will be able to make much more aggressive edits because the image file now has all the highlight information from one original photo, mid tones from another, and shadows from the last. You can now edit each range of tones without losing information from the others.
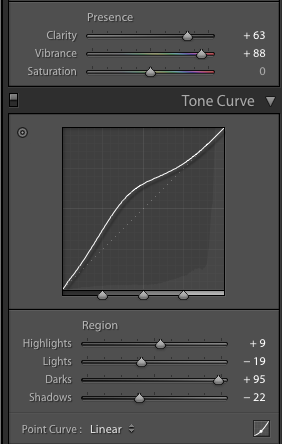
I've put screenshots of the Lightroom edits I made in the short slideshow that follows. In particular I ended up with a huge amount of sharpening - much more than I would ever normally use. I thought I would be able to get the look with just the clarity slider, but that didn't work.
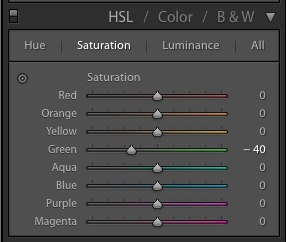
The edits I made to the green slider were to reduce the oversaturation and lighten the green tones of the stems slightly.
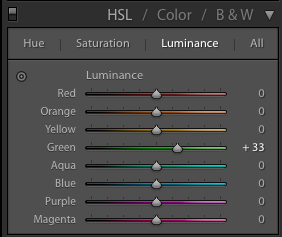
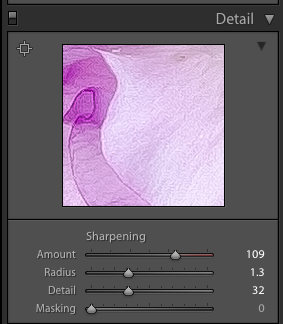
You'll notice from the first image in the slideshow, the one with the sweet peas, that there is a slight vignette, and you can see the shadows cast by the stems. I don't mind these, and would be happy to leave them in place. If you want a completely clean background though, you either need to fix it in camera or in editing. To fix in camera, I would have needed a much stronger light box. Mind wasn't putting out enough light (it's very old). To fix in editing I took the image into Photoshop, selected everything but the flowers (with a combination of the magic wand tool and a bit of masking), deleted the background and replaced it with a plain white layer:

Photoshop mask prior to deleting the white background
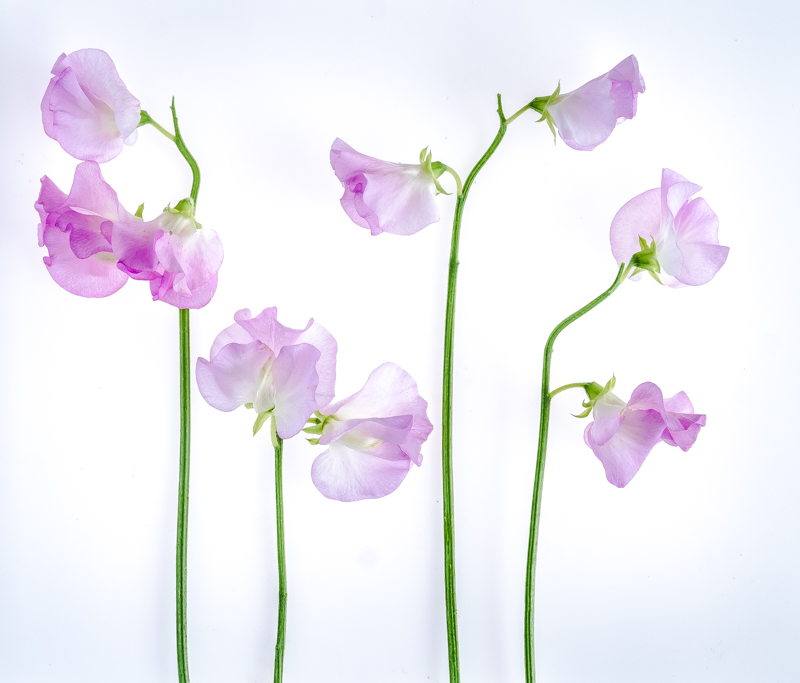
This was my finished image:

And just out of interest, here's what I managed using just my iPhone (edits in Enlight app, on my phone, no background replaced):

Join A Year With My Camera
Get a free email every Thursday for an entire year, and take your photography from cautious to confident.
This is one of a series of posts with behind the scenes steps of floral photography. To see the rest of the posts, click here: The Art Of Flower Photography.